MailChimp- email marketing platform for your online store

Sell more with Mailchimp. Connect your store to create targeted campaigns, automate helpful follow-up emails, and recommend products that customers will love.
- Build your email list
- Create a campaign
- Test and send
- Run reports
- Keep improving
This guide will help you through connection to Mailchimp step by step- easily.
Registration, create your own list, connect your online store
1. In a case, you did not sign up for Mailchimp account yet, please do it firstly. Visit MailChimp page and create your account. It is free. Fill in necessary fields and continue.
2. Connect your online store via API key. After you log into your MailChimp account, go to the upper right corner section, click on the "ACCOUNT" page.

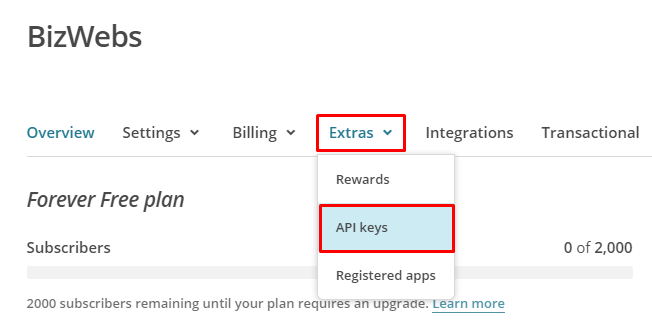
3. Click on the section EXTRAS and choose API keys page.
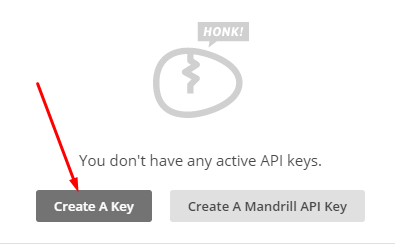
4. Create new key. Just click on the button CREATE A KEY. You will paste this key into Flox administration later. Next step is to create List.

5. Create LIST- a collection of contacts who can receive email or social ads from your organization. You need two different lists SUBSCRIBERS and UNREGISTERED SUBSCRIBERS.
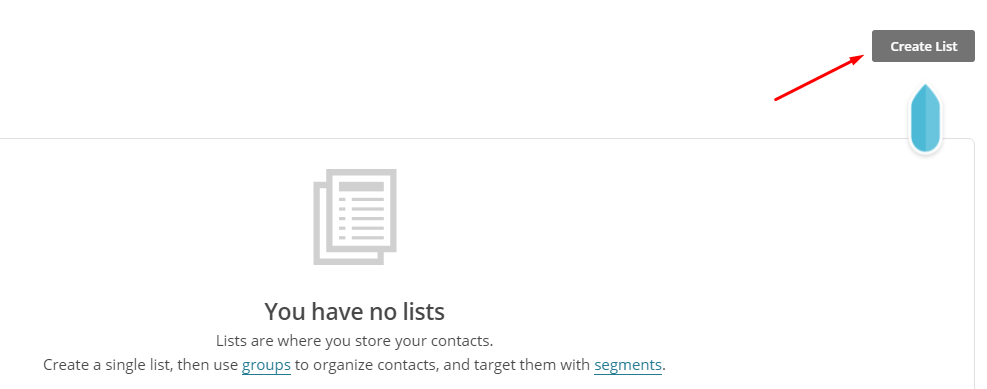
6. In the main menu, click on the page LISTS and later on click on the button CREATE LIST
7. Fill in all necessary fields, data and SAVE.
8. In a case, you don´t have any contacts, the system notifies you to add new ones. Add / import your contacts from CVS or .txt file or copy and paste .xls or .xlsx files. Or use one of the integrated systems.
How to get it from your online store? Easily. Just export the .xls file with PERSON data inside.
Don´t forget you need two different lists SUBSCRIBERS and UNREGISTERED SUBSCRIBERS
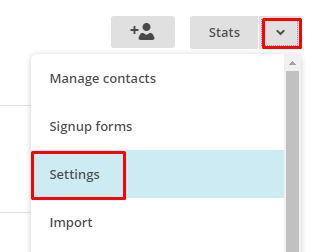
9. Copy unique ID for your lists. All your lists are visible in the LIST page in MailChimp account. Select a list and hit the icon "arrow" in a right corner. Choose SETTINGS page.
10. Scroll down your page and find unique ID for each list. You will insert this code into your store in next steps.
Integrate MailChimp into your online store
1. Log into your BizWebs website. Go to admin section SETTINGS / MARKETING and PPC / MAILCHIMP. Check the box Access to API and activate API.
2. Fill in all the forms you have created in previous steps:
API key - MailChimp API key
List ID - Subscribers
List ID - Unregistered subscribers
Store ID - Your bizwebs.com website
Send data from orders: After you check the box, a system sends information about the purchased products of all registered users.
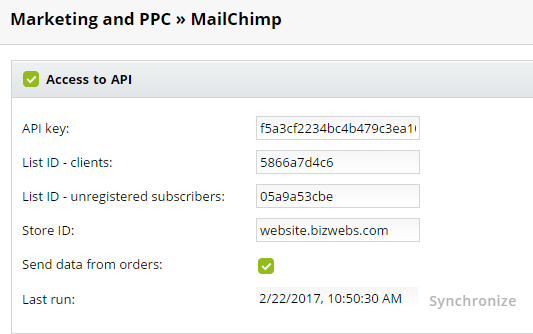
3. Click on the button SYNCHRONIZE and don´t forget SAVE. This feature imports all recent emails, products, orders into MailChimp account.

 If the implementation is correct, all your data (adding clients, products, an order creating) are synchronized automatically. But in a case you want to synchronize your data "right now", you can do it manually in section SETTINGS / MARKETING and PPC / MAILCHIMP.
 All your products are automatically synchronized with MailChimp account. When you create a new campaign in MailChimp, add your products into email campaign to boost your sales.
How to promote your products with MailChimp campaign?
First of all, you need to create a new campaign. New email campaign starts from MailChimp account section CAMPAIGNS. Click on the button Create Campaign. Select name and type of the campaign.

In the next steps, choose a list to who are you sending to, set up campaign info, select template, and campaign design. Continue by clicking on the button down bellow NEXT.

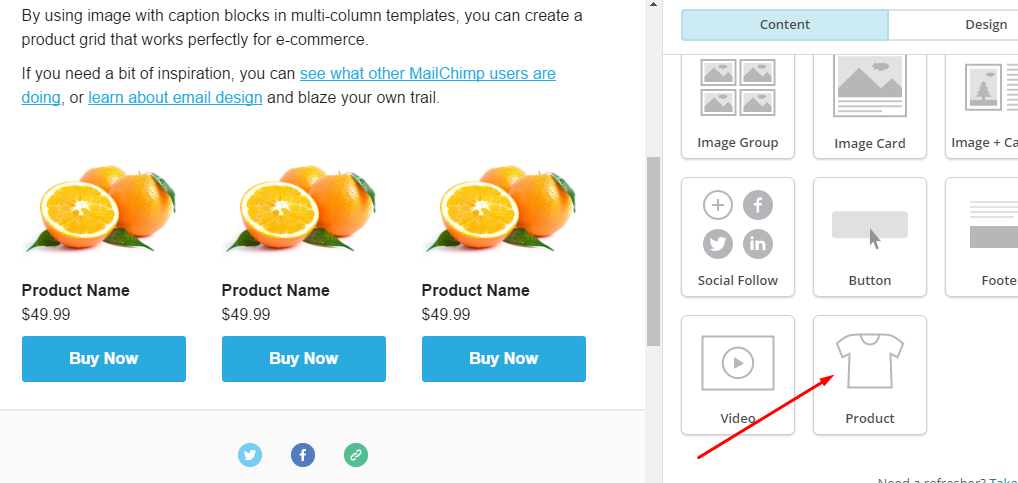
Add a Product content block to your email to quickly promote best-selling products or special offers. Drag and drop the block into your campaign or automation email, and choose the products you want to share with your subscribers. After you send, check out revenue results in Reports.
In the Content tab of the editing panel, you'll see two options. Click Use Top Sellers to include up to four of your store's top selling products. Click Browse All to choose a certain product from your store.
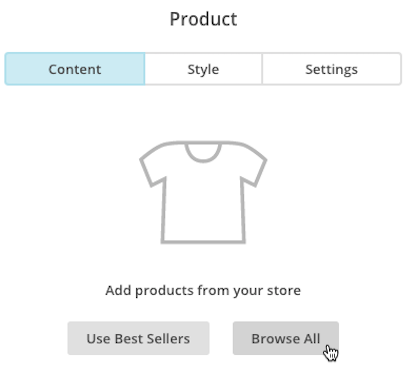
Each block can contain any combination of the following: product name, custom description, price, and a call-to-action button.
 If you choose Browse All, a Select a product pop-up modal will appear. Click the Product drop-down menu to choose from the first 10 products in your store. Or, type a product name into the search bar to expand your search.
For more details follow MailChimp instructions.
 If you are a BizWebs user with Business or Premium plan you are lucky. Active your MailChimp for free and use immediately. In a case you run on other packages, please upgrade to higher version.


